
Groki Bot
Everything for the Groki Bot desktop robot (M5Stack CoreS3 with a Stack-chan base) in one repository: the robot firmware, the gateway that runs on your computer, and the link that lets the robot hand tasks to an agent in the Grok Bot app.
Three ways to use it
Each path adds to the one before it. Start with path 1.
| What you get | What you need | |
|---|---|---|
| 1. Firmware only (start here) | Voice conversation with the robot through OpenAI Realtime or Google Gemini Live, using your own API key | The robot, a USB-C cable, desktop Chrome or Edge, an OpenAI or Gemini API key |
| 2. + gateway | A "Hi Grok" wake word and Gemini Live voice running through your computer; on a Mac with a camera, the head follows your face; Claude or another MCP client can make the robot speak and read its status | Path 1, plus a computer on the same Wi-Fi running gateway/ with a Gemini API key |
| 3. + Grok Bot | Say "look this up" or "research X": the robot hands the task to your agent in the Grok Bot app and reads the agent's replies aloud as they arrive | Path 2, plus the Grok Bot app signed in on that computer and the gbot CLI |
How the pieces talk to each other (ports, protocol, message flow, what each part needs): docs/architecture.md.
 Robot ──(path 1) wss──▶ OpenAI Realtime / Gemini Live
   │
   └──(path 2) ws://<LAN IP>:8765──▶ Gateway ──▶ Gemini Live
                                       │  ▲
                        Claude ──MCP───┘  │ (path 3) HTTP 127.0.0.1:18770
                                          ▼
                              forwarding service ──gbot CLI──▶ Grok Bot app
Path 1: firmware only
- Flash. Open the web flasher at https://josssphzhou.github.io/groki-bot/ in desktop Chrome or Edge, connect the robot over USB-C, click Connect and pick the serial port, choose the latest release and the
CoreS3board, then click Flash. Tick "Erase flash before write" if you want a clean device. If the page cannot connect, put the board in download mode (see Download mode). - First-time setup. Open the BLE settings page at https://josssphzhou.github.io/groki-bot/settings.html (Web Bluetooth, desktop Chrome or Edge only) and click "BLE 连接" (Connect over BLE).
- Tab "连接" (Connection): enter your Wi-Fi SSID and password. The robot only supports 2.4 GHz Wi-Fi.
- Tab "对话" (Conversation): pick the provider ("OpenAI Realtime" or "Google Gemini Live") and paste the matching API key.
- Click "保存并重启" (Save and restart).
- Talk. After the reboot the robot joins Wi-Fi and starts listening. Just speak to it.
The default provider is OpenAI. Without an API key the robot connects to Wi-Fi but never answers. Keys are not built into the firmware; they are stored in the device's NVS.
Path 2: firmware + gateway
Use this if you want the robot's voice to run through your computer, for example to use Gemini Live with a wake word, or to connect Claude to the robot.
- Do steps 1 and 2 of path 1 (you can skip the API key).
- Install and start the gateway on a computer on the same Wi-Fi, following gateway/README.md:
git clonethis repository,cd groki-bot/gateway,uv sync --all-extras, put your Gemini API key in.env, then start it with Claude Code (claude mcp add groki -- uv run --directory "$(pwd)" stackchan-mcp) or as a background service. - In the BLE settings page, tab "对话" (Conversation):
- Provider: "XiaoZhi 服务器" (XiaoZhi server).
- "XiaoZhi 服务器 URL" (XiaoZhi server URL):
ws://<your computer's LAN IP>:8765, for examplews://192.168.1.20:8765. - "XiaoZhi 令牌" (XiaoZhi token): if the gateway has
STACKCHAN_TOKENset, enter the same value here. If the gateway has no token, leave this empty. - Click "保存并重启" (Save and restart).
- Check http://127.0.0.1:8766/debug/status on the computer:
"device": {"connected": true}. Say "Hi Grok". To use "Hey Groki" as the wake word instead, setSTACKCHAN_WAKE_PHRASE=hey grokiingateway/.envand restart the gateway.
What path 2 does and does not do with this firmware: the gateway handles voice conversation, and on a Mac with a camera it turns the robot's head to follow your face (Face tracking). Head, LED and camera control from Claude through the gateway's MCP tools does not reach this firmware, because its XiaoZhi client announces features.mcp=false in its hello message (components/conversation/xiaozhi_client.cpp) and does not handle MCP requests from the server. Face tracking uses the XiaoZhi head message instead, which the firmware handles. Gemini's own head, face and LED tools (off by default; STACKCHAN_GEMINI_DEVICE_TOOLS=1) also reach the firmware this way: move_head as a head message (firmware newer than v0.2.1), faces as emotion messages and LED colours as led messages. Camera tools do not work with this firmware.
Path 3: firmware + gateway + Grok Bot
Use this if you already use the Grok Bot desktop app and want the robot to pass real work to one of your agents. Small talk stays with Gemini; tasks go to the agent, and the robot reads the agent's replies aloud as they come in.
- Get path 2 working.
- On the same computer: sign in to the Grok Bot app and install the
gbotCLI (npm install --global grok-bot-cli; it needs a recent Node.js, see grok-bot-cli). Check withgbot bots list. - In
gateway/.env, setSTACKCHAN_TOOL_BOTto the agent's name (for exampleSTACKCHAN_TOOL_BOT=assistant). The feature stays off until this is set. - Start the forwarding service next to the gateway:
cd gateway && uv run stackchan-gbot-proxy(listens on127.0.0.1:18770only). Restart the gateway. - Say "Hi Grok, look up tomorrow's weather". The robot says the task has been sent to assistant, then reads the agent's replies.
Details and troubleshooting: gateway README, Grok Bot hand-off and docs/architecture.md, section 4.
Letting Claude Code change the face directly
Separate from the gateway, the firmware has its own token-protected HTTP API (/mcp/*). tools/stackchan-channel/ wraps it as an MCP server for Claude Code, with the tools say, set_expression, set_balloon and get_state. Set the token in the BLE settings page (tab "维护", Maintenance, section "Claude Code Channel (MCP)"). Notes: that README is in Japanese, and say uses the on-device Japanese speech engine, so it only reads hiragana.
Download mode
On CoreS3, hold the RST button on the bottom of the unit until the green LED lights up, then release it. The board then shows up as a serial port and the web flasher or idf.py flash can connect.
Serial port names:
| OS | Port |
|---|---|
| macOS | /dev/cu.usbmodem* (run ls /dev/cu.usbmodem*) |
| Linux | /dev/ttyACM0 |
| Windows | COMx (check Device Manager) |
The Grok face is compiled into the firmware, so there is nothing else to flash.
About this repository
| Directory | What it is |
|---|---|
main/, components/, assets/ |
Robot firmware (ESP-IDF, C++20) |
| gateway/ | Gateway for your computer (Python): Gemini Live voice, wake word, MCP server, Grok Bot forwarding service |
| docs/architecture.md | How firmware, gateway and Grok Bot communicate |
docs/ |
Web flasher, license page and other documentation, published to GitHub Pages |
| tools/vision-tracker/ | Mac face tracker (Swift, Apple Vision) that the gateway starts for face tracking |
tools/ |
Settings pages, avatar DSL compiler, tools/stackchan-channel/ (MCP for Claude Code over the firmware's HTTP API), tools/face-demo/ (face demo scripts) and other host tools |
The eyes use the eye-ring contour system from the aora-bot Emotion Ball (15 on-device expressions with blinking, ring cycling and four-weight blending), while the body keeps the DSL animations for breathing, happy bounce, squash while speaking, shy floating hearts and blush. The eye-ring data is used under the Emotion Ball Community License, which allows non-commercial use only; see License.
Features
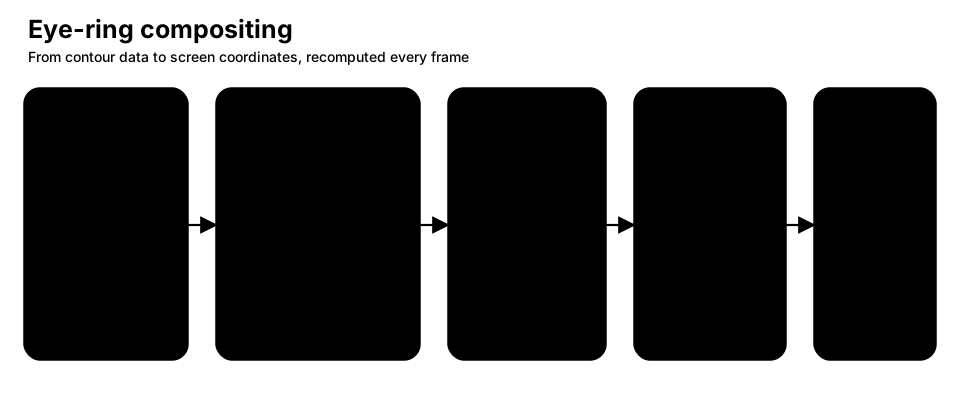
- Expression engine: aora eye-ring contours (48 points per eye), 15 expressions, blink, ring cycling and four-weight blending. The body layer keeps breathing, happy bounce, squash while speaking, shy floating hearts and blush.
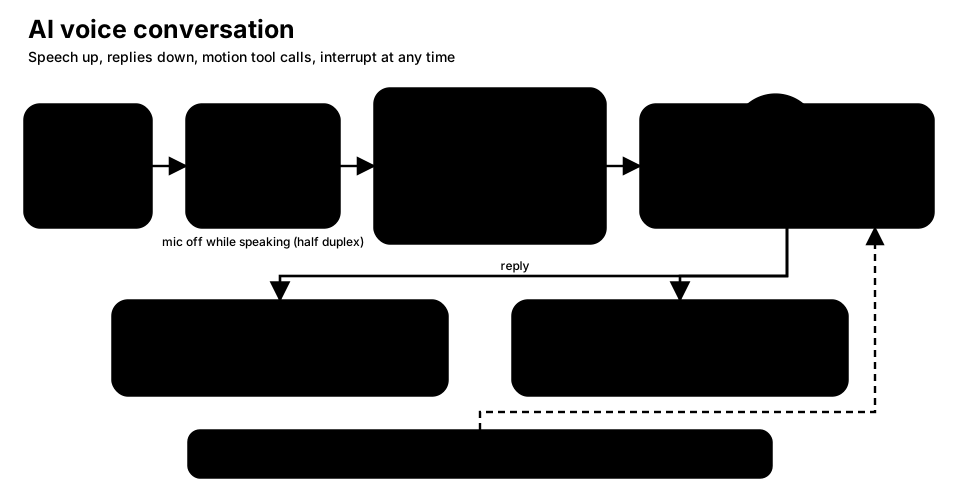
- AI voice conversation: WebSocket connection to OpenAI Realtime, Google Gemini Live or a XiaoZhi server. Microphone audio goes up; reply audio drives the mouth. The half-duplex CoreS3 mutes the microphone while speaking; tap the screen or touch the head to interrupt a reply (barge-in).
- Servo head motion: SCS0009 yaw and pitch with a trapezoidal velocity profile.
- Face tracking (with the gateway on a Mac): a Mac camera tracker finds your face and the gateway turns the head to follow it; following pauses while the robot talks or listens. Setup: gateway README, Face tracking.
- Head touch: Si12T three-zone capacitive touch (front, middle, back); stroking switches to the shy face (Affection).
- Speech balloon: reply text on a rounded white panel at the bottom of the screen; long text scrolls as a marquee.
- Three setup paths: BLE (NimBLE GATT), Wi-Fi STA (mDNS HTTP), SoftAP with a captive portal (iOS friendly).
- OTA: dual partitions with boot verification and rollback. Update over BLE in chunks, by local upload over Wi-Fi, or by letting the device fetch the matching board firmware from GitHub Pages.
Hardware
Standard unit: CoreS3 + Stack-chan base

| Item | Spec |
|---|---|
| SoC | ESP32-S3R8 |
| PSRAM | 8 MB, in-package Quad SPI, 80 MHz |
| Flash | 16 MB external SPI (W25Q128 package) |
| Display | 320×240 IPS touch screen |
| Servos | SCS0009 ×2 (yaw / pitch) |
| Servo bus | UART1, TX GPIO 6 / RX GPIO 7, 1 Mbps, 8N1 |
| Servo ID / zero | Yaw ID 1, zero 460; pitch ID 2, zero 620 |
| Step | 1 step ≈ 0.3125° (deg = (raw - zero) * 5 / 16) |
| Default soft limits | Yaw ±40°, pitch -10° to +25° |
| Head touch | Si12T, I²C 0x68, three zones (front / middle / back) |
| Battery gauge | INA226, I²C 0x41 |
| IO expander | PY32, I²C 0x6F; pin 0 controls servo VM power (wait 200 ms after enabling before using the bus) |
| PMIC | AXP2101, I²C 0x34 (managed by M5Unified) |
| LCD touch | I²C 0x38 (managed by M5Unified) |
Takao Base runs the same cores3 firmware: servos use Port A (TX GPIO 2 / RX GPIO 1, half duplex with echo cancellation), with no servo power control and no INA226.
Other supported boards
| Board | Build slug | Display | Notes |
|---|---|---|---|
| CoreS3 + Stack-chan base | cores3 |
320×240 IPS + touch | Default. Two servo axes, head touch, INA226 |
| CoreS3 + Takao Base | cores3 |
Same | Half-duplex servos on Port A; no servo power control or battery gauge |
| AtomS3R + Atomic ECHO BASE | atoms3r |
128×128 LCD | No servos. 8 MB Octal PSRAM, 8 MB flash, ES8311, BtnA toggles UI / AP |
| AtomS3 (no PSRAM) + ECHO BASE | atoms3 |
128×128 LCD | Slim profile. No conversation, no BLE audio, no RTP |
| M5 StopWatch (C152) | stopwatch |
466×466 round AMOLED + touch | No servos. 8 MB Octal PSRAM, 16 MB flash, gaze follows touch, ES8311 |
The board is detected at boot and reported through set_board_kind() to the UI and feature switches. Build with make build BOARD=<slug> (default cores3). PSRAM mode is fixed at link time per board, so firmware images cannot be swapped between boards.
Technical specs
| Item | Spec |
|---|---|
| Framework / language | ESP-IDF 5.5 (verified on 5.5.4; 5.4.2 also compiles) / C++20 |
| Target chip | esp32s3 |
| Face rendering | M5GFX. Full-screen buffer when PSRAM is present; 17 ms budget per frame; full-screen overlays yield the CPU every 33 ms |
| Expressions | 15: Neutral, Happy, Sad, Angry, Doubt, Sleepy, Listening, Thinking, Excited, Curious, Confused, Surprised, Dizzy, Affection, Bored |
| Eye-ring compositing | 48-point contour per eye, blended point by point with four weight sets (expression, expression_from and two hold layers); ring pool rotates about every 340 ms; blink, one-eye wink and openness squash vertically around the centroid after blending |
| Avatar DSL | .avdsl source compiled to .avbc bytecode, hot-swappable over BLE or Wi-Fi. The default face is assets/grok_face.avdsl |
| Lip sync | 16 kHz mono, 256-point radix-2 FFT; speech-band log energy plus spectral flux; EWMA noise floor follows the environment |
| Servo motion | Trapezoidal velocity PathGenerator, torque on only while moving; limits stored in NVS |
| Volume | 0 to 200%, adjustable live from BLE, Wi-Fi or the on-device UI |
| OTA | Dual slots with boot rollback. CoreS3 / StopWatch 4 MiB per slot (partitions_16mb.csv); AtomS3R 0x350000 per slot (partitions_8mb.csv); AtomS3 3 MiB per slot (partitions.csv) |
| BLE | NimBLE, Just Works pairing; application-layer X25519 + AES-256-GCM; optional password |
| Wi-Fi settings | After connecting, HTTP on port 80 serves settings_wifi.html, mDNS stackchan-XXXXXX.local |
| SoftAP | SSID Stackchan-XXXXXX with WPA2; the LCD shows a Wi-Fi QR code; DNS hijack plus an HTTP 404 catch-all opens the captive portal |
Build from source
You only need this if you want to change the firmware. To just use the robot, flash a release with the web flasher (path 1 above).
Docker is the recommended way to build; you do not need ESP-IDF on your machine. Start Docker Desktop (or the Docker daemon) first.
Docker (recommended)
The image is espressif/idf:release-v5.5. The first pull is about 14 GB. The official image has no Node; the Makefile installs Node.js 18+ inside the container. Output goes to build-cores3/.
git clone https://github.com/JosssphZhou/groki-bot.git
cd groki-bot
git submodule update --init --recursive
tools/apply-m5-patches.sh                    # one-line patch for M5Unified
make build-docker BOARD=cores3
BOARD= can be stopwatch. In this release cores3 and stopwatch are verified to build. atoms3r and atoms3 have not been rebuilt yet: their earlier build failure (face animation assets overflowing the 1 MB storage partition) no longer applies because those assets were removed; see known issues, item 4. The Docker path must be given the same BOARD so the matching sdkconfig defaults are loaded; output goes to build-<board>/.
Flashing does not run inside Docker. To write the firmware you just built, run on your machine (replace the port with yours, see Download mode):
make flash BOARD=cores3 PORT=/dev/cu.usbmodem1101     # macOS example
make monitor BOARD=cores3 PORT=/dev/cu.usbmodem1101
make flash needs ESP-IDF installed on your machine (it loads the IDF environment and then calls idf.py flash). Without a local IDF, use the web flasher for a published release: https://josssphzhou.github.io/groki-bot/. That page reads GitHub Releases; it cannot pick files from build-cores3/.
Local ESP-IDF
Environment: ESP-IDF 5.5 (verified on 5.5.4). Install it following the Espressif documentation, run ./install.sh esp32s3 in the IDF source directory, then source export.sh. The Makefile default is IDF_PATH=$(HOME)/esp-idf/5.5.4. Node.js 18+ must be on the build machine's PATH (CMake looks for node at configure time to compile .avdsl to bytecode; the compiler is in tools/avatar_dsl/). If the system python3 is 3.14, IDF 5.5 looks for a matching virtual environment and make fails immediately when it is missing.
git clone https://github.com/JosssphZhou/groki-bot.git
cd groki-bot
git submodule update --init --recursive
tools/apply-m5-patches.sh                    # one-line patch for M5Unified
make set-target BOARD=cores3                 # first time only (each BOARD has its own build directory)
make build     BOARD=cores3
make flash     BOARD=cores3 PORT=/dev/cu.usbmodem1101    # Linux: /dev/ttyACM0
make monitor   BOARD=cores3 PORT=/dev/cu.usbmodem1101
Local make build BOARD=<slug> output goes to build-<board>/.
If CMake reports Could not find NODE_EXECUTABLE, the current environment (including the Docker image) has no node on PATH. No source file is missing.
tools/apply-m5-patches.sh only fixes the uninitialized buf in upstream M5Unified RTC_PowerHub_Class::setAlarmIRQ, which otherwise trips GCC 14 -Werror=maybe-uninitialized.
OpenAI and Gemini API keys are not compiled into the firmware; they are written to NVS at runtime through the BLE or Wi-Fi settings page. A compile-time default can be supplied in sdkconfig.defaults.local, which is gitignored.
Web flasher and settings pages
Flash a published release from the browser (Chrome / Edge):
- Flash: https://josssphzhou.github.io/groki-bot/
- BLE settings: https://josssphzhou.github.io/groki-bot/settings.html (Web Bluetooth, desktop Chrome / Edge only)
- Wi-Fi settings: once the device is on Wi-Fi, open
http://stackchan-XXXXXX.local/(mDNS) - iOS / SoftAP: in AP mode, scan the Wi-Fi QR code on the LCD with the iPhone camera and the captive portal opens the settings page. On CoreS3 / StopWatch, tap the top-right corner of the screen to open the device UI and choose AP mode on the control page. On AtomS3R / AtomS3, a short press on BtnA opens the status overlay and a long press cycles
operation_mode.
After a vX.Y.Z tag is pushed, CI (when GitHub Actions is enabled) builds the four boards and attaches them to a Release; the Pages site then updates. The web flasher source is docs/index.html and the BLE settings page source is tools/settings.html.
License
First-party source in this repository (components/board, components/scs_servo, components/avatar, components/avatar_vm, components/groki_motion, components/jtts, components/conversation, components/config_service, components/wifi_config_service, components/telegram, main, tools) is distributed under the Boost Software License 1.0 (LICENSE).
Gateway (MIT): gateway/ is a fork of kisaragi-mochi/stackchan-mcp and stays under the MIT License; the upstream copyright lines are kept in gateway/LICENSE. Its Python dependencies are listed in THIRD_PARTY_NOTICES.md. The gbot CLI (grok-bot-cli, MIT) is an external tool and is not included.
Submodules (components/M5GFX / components/M5Unified / components/tl_expected/expected) and managed_components (espressif/esp_audio_codec / espressif/esp_websocket_client / espressif/mdns / espressif/esp_jpeg / espressif/esp32-camera and others) follow their own upstream licenses.
Eye-ring data (non-commercial): main/aora_ring_data.hpp is generated by tools/aora_rings/convert.mjs from emotion-ball/ in aora-bot (Copyright (c) 2026 sam70361). It and the animation parameters in main/aora_face.hpp are used under the Emotion Ball Community License, which permits non-commercial use only. The full license text, copyright notice and upstream NOTICE.md are in third_party/emotion-ball/. The ball character's visual design is not used. Commercial use of this firmware needs a commercial license from the upstream author or replacement of that data.
Third-party attributions for the hts_engine API used by HMM speech synthesis (Modified BSD, Nagoya Institute of Technology / Tokyo Institute of Technology) and the bundled HMM voice "Mei" (CC BY 3.0, Nagoya Institute of Technology / MMDAgent Project Team) are also collected in THIRD_PARTY_NOTICES.md. HTML version: https://josssphzhou.github.io/groki-bot/licenses.html.
Acknowledgements
Groki Bot started from Kenta IDA's stackchan-idf (BSL-1.0), and the gateway from kisaragi-mochi's stackchan-mcp (MIT). Thanks to them and to the Stack-chan community.